It’s a familiar sound in any San Diego home: the thud of a doorknob hitting the wall a little too hard, or the scrape of a furniture corner during a move. Now you’re left with an ugly, fist-sized hole in your drywall. For a hole around four inches, you’re right at the sweet spot where a DIY repair is possible, but a flawless finish takes a bit of local know-how.
This guide walks you through the process, from understanding why these holes happen so often in our area to matching those tricky San Diego wall textures.
Why drywall holes happen in San Diego homes
While a misplaced chair or an accidental impact is a universal problem, San Diego homes have a few specific reasons why you might find yourself needing a drywall patch.
Doorknob impact: This is the number one cause. Many homes, from older bungalows in North Park to newer tract homes in Carmel Valley, may lack proper doorstops, or the existing ones fail. One swing of the door is all it takes to punch a perfect, knob-shaped hole in the wall.
Plumbing and electrical access: Our region has a mix of housing stock. In older homes, plumbers and electricians often need to cut access panels into walls to update pipes or run new wiring. When the job is done, you’re left with a neat, square hole that needs patching.
Moving and rearranging: San Diego is a transient city. Whether it’s military families moving from MCAS Miramar or new residents settling in, furniture is always on the move. Scuffs, dings, and outright holes are a common consequence of navigating tight hallways and staircases.
Minor earthquake shifts: While major damage is rare, the small, frequent seismic shifts we experience can sometimes cause hairline stress cracks, especially around door and window frames. If a crack widens or connects with an existing weak spot, a simple crack repair can turn into a larger patch job. Understanding the cause helps you decide if it’s a one-time fix or a sign of a recurring issue.
Tools and materials you’ll need (and what you can skip)
Heading to the hardware store can be overwhelming. You don’t need to buy a professional’s entire toolkit for a single four-inch hole. Here’s a practical list focused on getting this one job done right.
The essentials
- Drywall patch kit: For a 4-inch hole, a self-adhesive mesh or thin metal patch is perfect. They’re designed to cover the hole and provide a surface for the joint compound to adhere to. Get one that’s at least 6x6 inches to give you plenty of overlap.
- Joint compound or spackle: For a beginner, pre-mixed all-purpose joint compound (often called “mud”) is the most forgiving option. It dries slowly, giving you more time to work. Spackle is fine for very small nail holes but isn’t strong enough for a 4-inch patch.
- Drywall knives: You’ll need two. A 4-inch knife is good for the first coat, and a wider 6-inch or even an 8-inch knife is crucial for “feathering” the compound smoothly on later coats.
- Sandpaper: A small pack of 120-grit and 220-grit sandpaper is all you need. A sanding sponge is easier to hold and control than flat sheets.
- Utility knife: To clean up the edges of the hole before you start.
- Primer and paint: You must prime the patch before painting. The compound soaks up paint differently than the surrounding wall, and without primer, you’ll see a dull, flat spot. Get a small sample pot of your wall color for the final finish.
What you can probably skip
- Drywall hawk and trowel: These are for pros who mix large batches of mud. You can just use your drywall knife to scoop mud from the container.
- Mud pan: A small plastic container or even a sturdy paper plate can work for holding a small amount of compound.
- Power sander: This is overkill for a small patch and will likely create a bigger mess and potentially gouge the wall. Manual sanding gives you more control.
- “Hot mud” (quick-setting compound): While it dries fast, it’s very difficult to work with if you’re not experienced. It can set up on your knife before you’re done smoothing it. Stick with the pre-mixed bucket.
Step-by-step: patching a 4-inch hole with a drywall patch kit
With your materials ready, you can get this patch done in an afternoon, though you’ll need to account for drying time between steps. Patience is key to an invisible repair.
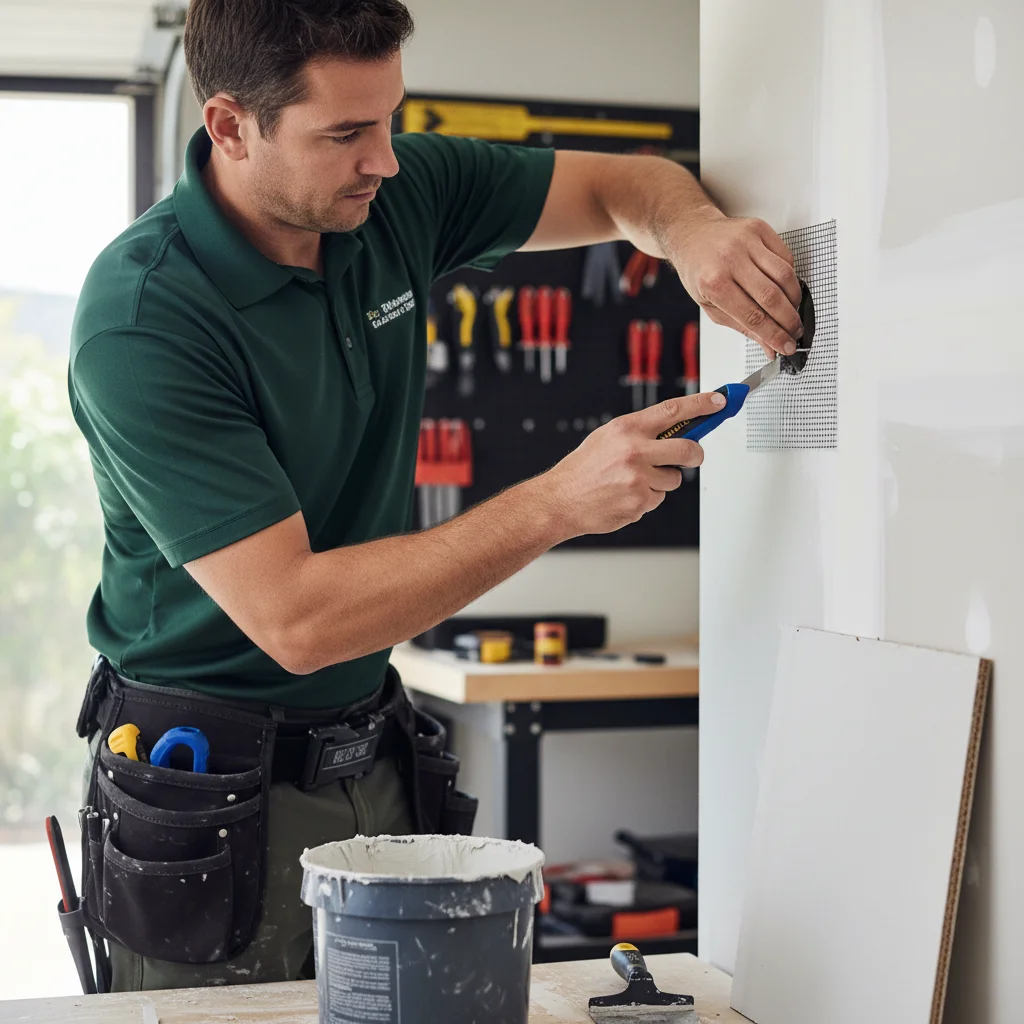
- Prepare the hole. Use your utility knife to cut away any loose paper or crumbled drywall from the edges of the hole. You want a clean, stable border. Wipe the area with a dry cloth to remove any dust.
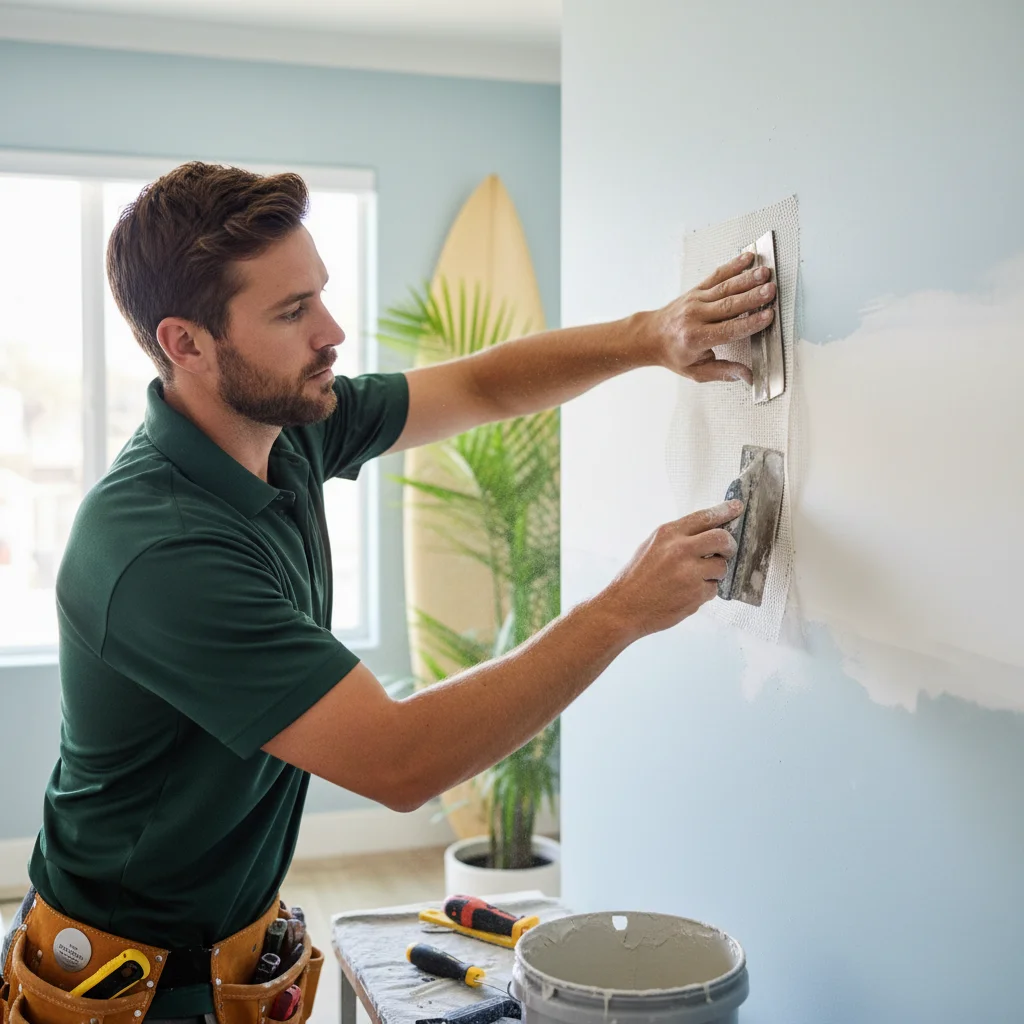
- Apply the patch. If you’re using a self-adhesive mesh patch, simply peel off the backing and press it firmly over the center of the hole. Make sure the edges are flat against the wall with no air bubbles.
- Apply the first coat of compound. Using your 4-inch drywall knife, scoop a small amount of joint compound and apply a thin, even layer over the entire patch. Start from the center and work your way out. The goal is just to fill the mesh and cover the patch. Don’t try to make it perfectly smooth on this first pass.
- Let it dry completely. This is the most important step. Depending on the humidity in your San Diego home, this could take a few hours or up to 24 hours. Don’t rush it. Once it’s bone dry (uniform light color, no cool spots), lightly sand it with 120-grit sandpaper to knock down any high spots or ridges.
- Apply the second coat. Now, switch to your wider 6-inch knife. Apply another thin coat of compound, extending it about two inches beyond the edge of the first coat. This is called feathering. Hold the knife at a low angle and use long, smooth strokes to blend the edges of the repair into the surrounding wall.
- Dry and sand again. Let the second coat dry completely. This coat is thinner, so it may dry faster. Once dry, sand it lightly with 220-grit sandpaper. Feel the surface with your hand; it should be smooth and level with the wall. If you can still feel a ridge or see a depression, apply a very thin third coat, feathering it out even wider.
- Final prep for paint. Once you’re happy with the final coat and it’s fully dry, give it a final, gentle sanding with 220-grit paper. Wipe away all the dust with a damp cloth. Now you’re ready for texture.
Texture matching: orange peel, knockdown, smooth
This is the step that separates a good patch from an invisible one. Most San Diego homes do not have perfectly flat, smooth walls. Matching the existing texture is crucial.
Orange peel
This is a very common, fine, bumpy texture that looks like the skin of an orange. It’s one of the easier textures for a DIYer to replicate.
- How to match: The best tool is an aerosol spray-on texture can. You can adjust the nozzle for a fine or coarse spray.
- Pro tip: Practice on a piece of cardboard first. Hold the can about 18-24 inches from the surface and use short, sweeping bursts. It’s better to build it up with a few light passes than to spray one thick, blobby coat.
Knockdown
Popular in homes built in the ’90s and later, this texture looks like flattened, irregular stalactites. It’s created by spraying on splatters of compound and then lightly “knocking them down” with a wide knife.
- How to match: This is much trickier. You can use the same aerosol can but on a heavier setting. Spray the texture onto your patch, let it set for 10-15 minutes until it’s tacky but not dry, then gently glide a wide, clean drywall knife over the surface to flatten the peaks.
- Pro tip: The timing and pressure are everything. Too soon and it will smear; too late and it won’t flatten. This often takes a professional touch to match seamlessly.
Smooth finish
While it sounds simplest, a true Level 5 smooth finish is the most difficult to achieve. The patch must be perfectly flush, as any tiny imperfection will be highlighted by paint sheen.
- How to match: It requires multiple, very thin skim coats of compound, feathered out 12 inches or more from the patch. Each coat must be perfectly sanded.
- Pro tip: After priming, shine a bright light at a sharp angle across the patch. This will reveal any tiny divots or bumps you missed.
After your texture is applied and dry, it’s time to prime and paint. A good primer seals the new patch and texture, ensuring the final coat of paint has an even color and sheen. For a truly invisible look, you might need a professional service for interior painting to blend the new paint with the old.
When to stop and call a handyman instead
A 4-inch hole is manageable. But there are clear signs when a DIY project can become a major headache. That’s when it’s time to put down the tools and call a professional.
- Holes larger than 6 inches: Once a hole is bigger than your fist, a simple mesh patch won’t provide enough support. A professional will use a “California patch” or install wood backing strips behind the drywall for a strong, permanent repair.
- Signs of water damage: If the drywall around the hole is soft, discolored, or has black or green spots, you have a bigger problem. The source of the leak must be fixed first, and the damaged drywall needs to be cut out and replaced, not just patched.
- Ceiling repairs: Fighting gravity is no fun. Patching a ceiling is messy, awkward, and much harder to get a smooth, invisible finish on.
- Plaster walls: Many older San Diego homes (think South Park or Kensington) have plaster and lath walls, not drywall. The repair process is completely different and requires specialized materials and skills.
- You need a perfect finish: If the wall is in a high-visibility area with lots of natural light, any small flaw in the patch or texture will be obvious. A professional Drywall Repair & Patching service has the experience to make the damage truly disappear.
- You have multiple holes: Patching one hole is a project. Patching five is a dusty, time-consuming job. A handyman can work efficiently and knock them all out in a single visit.
If your repair involves cutting into a wall with known plumbing or electrical, it’s always safer to consult a pro. For larger projects, understanding local regulations is also important, which you can learn more about from the San Diego County Building & Safety department.
What a pro patch costs in San Diego County
Hiring a handyman for a drywall patch is often more affordable than people think, especially when you factor in the cost of tools and your own time.
For a single, standard drywall hole (up to about 8x8 inches), you can expect the cost to range from $250 to $450 in the San Diego area. This price typically includes all labor and materials for the patch, texture matching, and priming. It usually assumes two or three visits to allow for drying time between coats.
The cost can be affected by:
- Location of the hole: Ceilings and hard-to-reach areas may cost more.
- Texture complexity: A complex knockdown or perfect smooth finish takes more skill and time than a simple orange peel.
- Number of repairs: The best value comes from bundling jobs. The cost for the second or third patch is significantly lower than the first, as the handyman is already on-site with all the necessary materials.
For a more detailed breakdown of what to expect, check out our full guide to drywall repair costs in San Diego.
When to call us
If the hole is bigger than your fist, if you’re dealing with water damage, or if you simply want a perfect, invisible finish without the dust and hassle, it’s time to call a professional. We specialize in making wall damage disappear, matching your texture perfectly so you’ll never know it was there.
Call us at (858) 400-4611 for same-day handyman service across San Diego County.
Want a flat-rate quote for this instead of doing it yourself? Call (858) 400-4611.
Request a quote