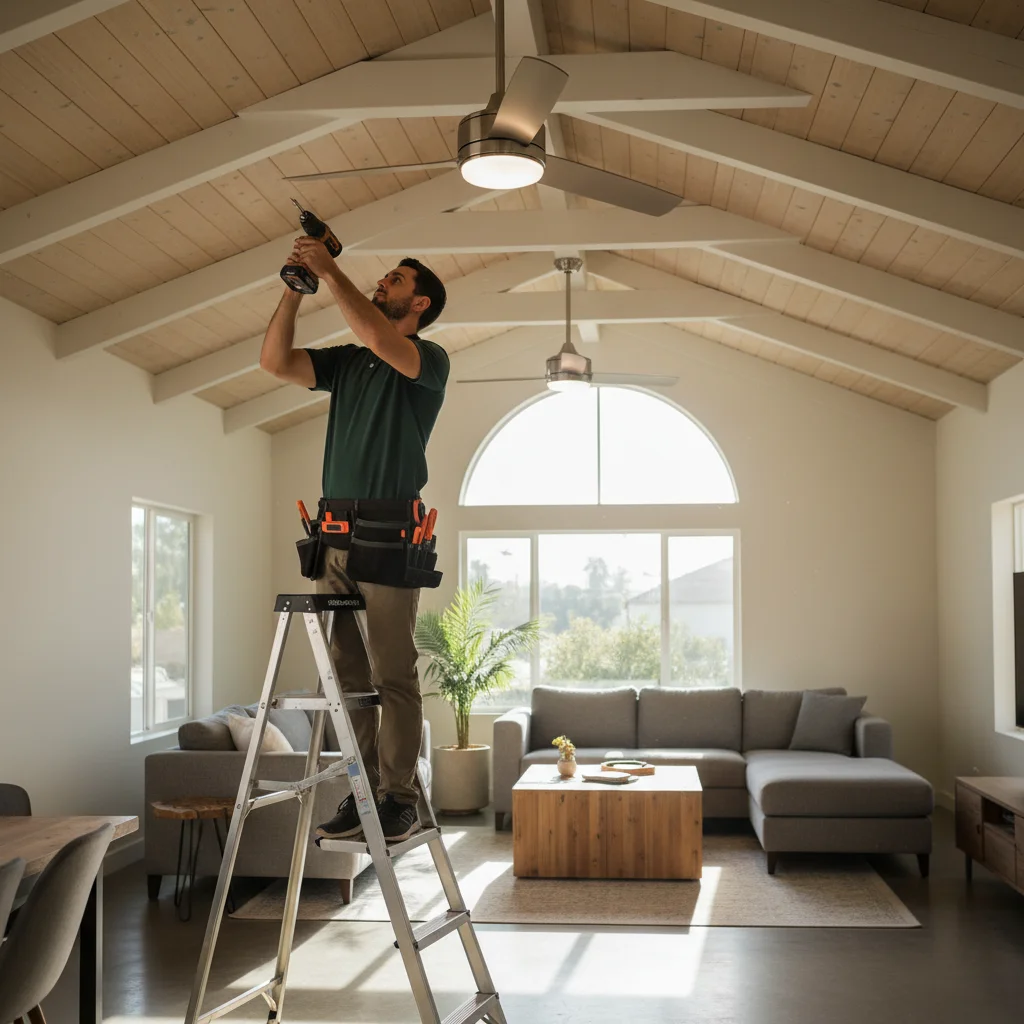
A new ceiling fan is one of the best upgrades for a San Diego home, offering a cool breeze on a warm Santa Ana day without running the AC. But before you head to the store or click “buy now,” a few quick checks can save you from purchasing a fan that won’t work for your space. Taking ten minutes to look at your ceiling can prevent the headache of returns or surprise installation costs.
The four things that determine if your ceiling can take a fan
Most of the time, installing a ceiling fan where a light fixture already exists is straightforward. But a fan is much heavier and creates constant vibration, which means the ceiling needs to meet four specific requirements. Ignore these, and you risk a wobbly, noisy fan or, in the worst case, a dangerous failure.
-
Structural Support: A fan must be anchored directly to a ceiling joist or a wood brace installed between joists. It can’t just hang from the drywall or plaster. If you’re replacing a light fixture, knock on the ceiling around the electrical box. A solid thud means you’re likely right next to a joist, which is good. A hollow sound means the box is probably just attached to drywall, and a new support brace will be needed.
-
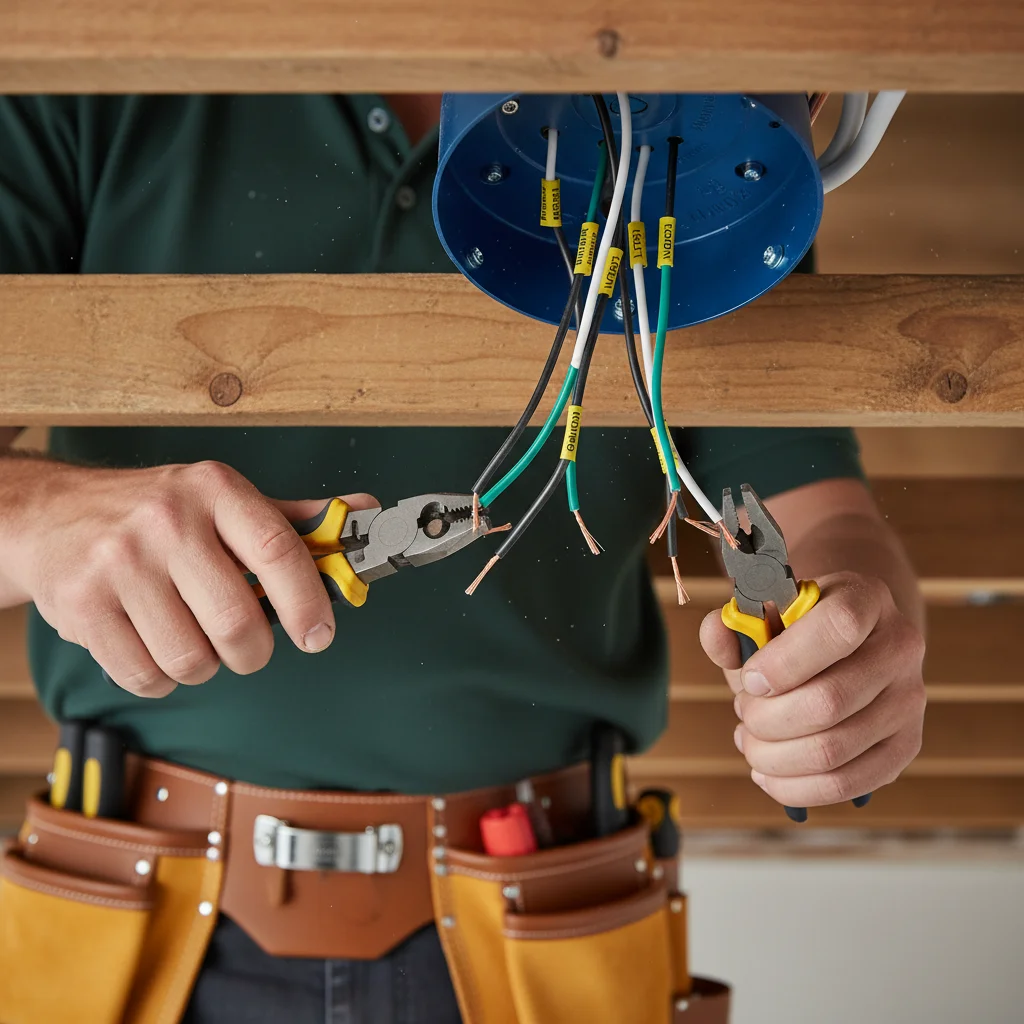
A Fan-Rated Electrical Box: The metal or plastic box in the ceiling that holds the wiring must be specifically rated to support the weight and motion of a ceiling fan. A standard light fixture box is not strong enough. We’ll cover this in more detail in the next section.
-
Adequate Ceiling Height: For safety, the blades of a ceiling fan should be at least seven feet from the floor. For a standard 8-foot ceiling, this means you’ll need a “hugger” or “flush-mount” fan that sits very close to the ceiling. For taller ceilings, you’ll use a downrod to bring the fan to the optimal height.
-
Blade Clearance: The fan blades need at least 18-24 inches of clearance from any walls or angled ceilings to ensure proper airflow and prevent wobbling. Before you buy, measure the room’s width and divide by two. This gives you the maximum fan diameter you should consider.
Junction box codes, old SD homes vs new builds
The single most common hurdle in a ceiling fan installation in San Diego is the junction box. This is the electrical box in the ceiling where the fan connects to your home’s wiring. Because a ceiling fan can weigh up to 50 pounds and is constantly in motion, it requires a box specifically designed to handle that load. These are called “fan-rated” boxes and are stamped as such by the manufacturer.
In many older San Diego homes, like the charming Craftsman bungalows in North Park or the 1950s ranch houses in Clairemont, the existing ceiling boxes are often small, metal “pancake” boxes. These were only ever intended to hold a lightweight light fixture. Hanging a fan from one of these is a major safety hazard; the screws can strip, and the box itself can pull away from the ceiling.
Newer homes, especially those built in the last 20 years in communities like 4S Ranch or Otay Mesa, are more likely to have fan-rated boxes already installed, even if there’s just a light fixture there now. Builders often install them as a standard feature to make future upgrades easier.
How can you tell what you have? The safest way is to turn off the power at the breaker, remove the existing light fixture, and look inside the box for a stamp that says “Acceptable for Fan Support.” If it’s not there, the box must be replaced. This involves removing the old box and installing a new, fan-rated one that securely fastens to the ceiling joists. While this is a common task for a handyman, it’s a non-negotiable step for a safe installation. For specifics on local building requirements, you can always consult resources like the City of San Diego’s Development Services Department.
Sloped ceilings, vaulted rooms, and downrod sizing
San Diego’s diverse architecture includes many homes with beautiful vaulted or sloped ceilings. While these create a wonderful sense of space, they add a layer of complexity to a ceiling fan installation. You can’t just mount a standard fan on an angled ceiling; it will cause the fan to wobble, make noise, and put undue stress on the motor.
To properly install a fan on a sloped ceiling, you need two things: a sloped ceiling adapter (sometimes called an angle mount) and a downrod of the correct length.
The adapter replaces the standard mounting canopy and has a ball-and-socket joint that allows the fan to hang perfectly level, even when the ceiling is pitched. Most quality fan brands sell these adapters separately, and they’re essential for any slope greater than about 15 degrees.
The downrod is the metal pipe that connects the fan motor to the mounting hardware on the ceiling. Its purpose is to lower the fan to the optimal height for air circulation, typically 8 to 9 feet from the floor. Choosing the right length is a simple calculation:
- 9-foot ceiling: 6-inch downrod
- 10-foot ceiling: 12-inch downrod
- 12-foot ceiling: 24-inch downrod
- 14-foot ceiling: 36-inch downrod
Using the wrong length is a common mistake. A fan mounted too high won’t move much air down where you can feel it. A fan mounted too low is a safety hazard. Before you buy the fan, measure your ceiling height at the point of installation so you can purchase the right downrod at the same time.
Smart-fan wiring (3-wire vs 4-wire)
Modern ceiling fans, especially “smart” models with Wi-Fi connectivity or separate controls for the fan and light, often have different wiring requirements than older, simpler fixtures. The key difference comes down to the number of wires running from the wall switch to the ceiling junction box.
Most homes are wired with what’s called a 3-wire system (or more accurately, a 14/2 or 12/2 cable). This includes one “hot” wire (usually black), one “neutral” wire (white), and a ground wire (bare copper). This is perfect for a standard light or a basic fan where a single switch turns everything on and off, and you use a pull chain to adjust speed.
However, if you want a wall switch with separate controls, one slider for the fan speed and another dimmer for the light, you typically need a 4-wire system (14/3 or 12/3 cable). This adds a second “hot” wire (usually red) to the mix. One hot wire powers the fan motor, and the other powers the light kit, allowing for independent control from the wall.
Before you buy a fancy smart fan with a complex wall control, it’s wise to check your wiring. If you only have a 3-wire setup, you can still install the fan, but you’ll have to rely on the included remote control to operate the fan and light separately. The wall switch will only function as a master on/off switch for the entire unit. Running new 4-wire cable is a much more involved job that requires cutting into drywall and is best left to a professional.
Cost: replacing a light fixture vs adding a fan from scratch
The cost to install a ceiling fan in San Diego depends almost entirely on one question: are you replacing an existing fixture, or are you adding a fan where nothing currently exists?
Scenario 1: Replacing an existing light fixture.
This is the most common and affordable scenario. If there’s already a light fixture in place, the wiring is done. The job involves removing the old light, confirming the ceiling fan junction box is fan-rated (and replacing it if it’s not), assembling the new fan, and connecting it to the existing wires. This is a perfect job for a handyman and usually falls under our standard light fixture installation service. The primary variables are the height of the ceiling and the complexity of the fan itself, but it’s generally a predictable and straightforward task.
Scenario 2: Adding a fan to a new location. This is a more complex project that involves more than just assembling the fan. We need to run a new electrical line from a power source (like a nearby outlet or switch) up into the ceiling. This process includes:
- Identifying a suitable power source.
- Cutting small holes in the drywall to fish the new wire.
- Installing a new fan-rated junction box with proper bracing.
- Installing a new wall switch.
- Patching and texturing the drywall where holes were made.
This type of work requires more time, materials, and a broader skillset, often crossing over from simple fixture installation into tasks covered by our general home repairs service. The cost will be higher due to the additional labor for wiring and drywall repair. When considering this type of project, it’s important to understand the full scope of work, which is something we clarify upfront before starting.
When to call an electrician instead of a handyman
We believe in being upfront about what tasks are right for a handyman and when you need a different kind of trade professional. When it comes to ceiling fans, the line is usually very clear.
You should call a handyman for your ceiling fan replacement or installation when:
- You are replacing an old fan or an existing light fixture.
- The wiring is already in place and in good condition.
- The main task is simply swapping the fixture, which may include replacing the junction box with a fan-rated one.
You should call a licensed electrician instead of a handyman when:
- You need to run a completely new circuit from your main electrical panel.
- The existing wiring is old, damaged, or insufficient (like knob-and-tube).
- The project involves significantly altering existing circuits in your home.
A good handyman knows the limits of their trade. If we open up a ceiling and find a complex wiring issue that requires a permit or a new circuit, we will always recommend you bring in an electrician. For most standard swaps, however, finding the right professional is key. If you’re unsure, our guide on how to choose a handyman in San Diego can help you find a reliable pro for the job.
When to call us
Checking your ceiling height, joist location, and wiring before you buy a fan can make installation day smooth and predictable. But if you get up on a ladder, take one look at the existing fixture, and decide you’d rather leave it to a professional, we’re here to help. From confirming you have the right support to assembling and balancing the new fan, we handle the entire process.
Already have a fan that’s acting up? Wobble, noise, a dead motor, or a broken pull chain are usually fixable, and our guide to ceiling fan repair in San Diego walks through the common ones.
Call us at (858) 400-4611 for same-day handyman service across San Diego County.
Want a flat-rate quote for this instead of doing it yourself? Call (858) 400-4611.
Request a quote