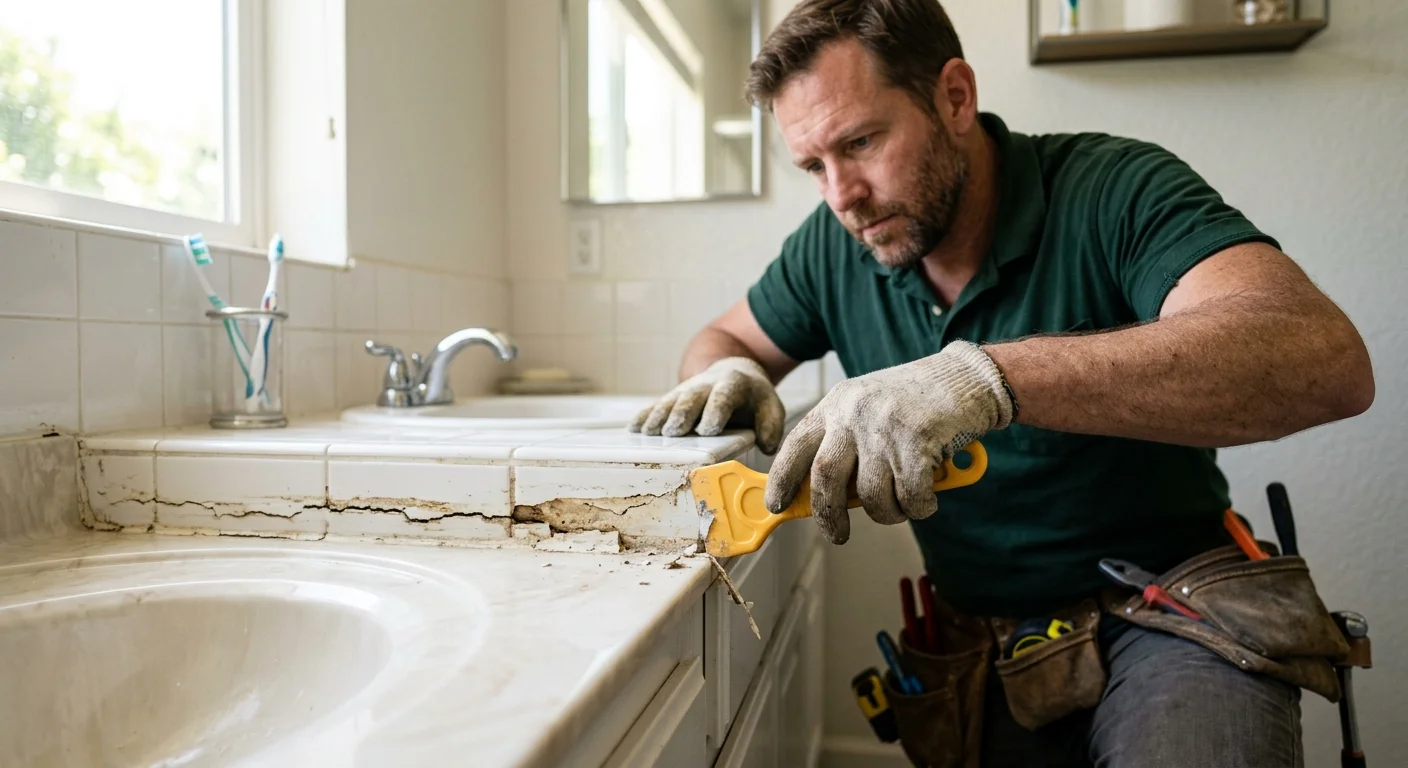
A visibly bad bathroom caulk bead usually needs more than another pass. Remove the loose or misshapen bead, clean and dry the joint, then apply one controlled replacement bead. The new caulk should contact both sides of the gap without covering damage below it.
The sequence that actually fixes it
- Pull the whole failed bead. Do not lay new caulk over old.
- Clean residue with a plastic tool, then alcohol or the solvent the old product needs. Let the joint dry.
- Check both surfaces. Soft drywall, moving tile, or a gap that changes width is not a caulk job.
- Tape if you need a straight edge. Cut the nozzle smaller than you think.
- Tool one continuous bead. Smooth it once.
- Keep the joint dry for the cure time on the tube.
If step 3 fails, stop and match a pro through caulking and sealing instead of hiding a leak.
Why new caulk fails over old sealant
Adding fresh caulk over a failed bead can make the joint look worse. The new material follows every ridge, crack, and bulge underneath it. Instead of one neat line, you get a wider bead with uneven edges.
Old sealant can also block contact with the tub, tile, sink, or wall. Loose sections may lift while the new layer still looks intact. A thin crack can then reappear along the same path. Smears outside the original joint create another problem because they’re harder to shape cleanly.
Start by checking the entire bead. Look from both ends instead of focusing only on the ugliest spot. Press lightly beside raised areas. Note any loose corners, open gaps, wrinkles, or sections that pull away from either surface.
The location matters too. A tub joint connects a large fixture to a wall finish. Shower caulk may meet tile, a shower pan, glass trim, or metal edging. Sink caulk often sits around a rim or along a backsplash. Each joint needs clean contact on both sides.
Don’t cover dark staining, crumbling grout, or a soft wall edge. Removing the old bead gives you a clearer view of the joint. That inspection helps separate a messy application from a repair below the surface.
The caulking guide for San Diego homes explains how different household joints are sealed. For a correction, the main rule is simpler: don’t treat failed caulk as a base layer.
When the whole bead needs removal
Remove the whole bead when failure extends beyond one isolated mark. Common signs include peeling ends, multiple cracks, open gaps, trapped debris, and a line that changes width repeatedly. A bead that has separated from either surface also needs a fresh start.
Partial removal can work when the surrounding caulk remains firmly attached and the repair point has clean stopping edges. That situation is less common with a visibly poor installation. Joining new caulk to uncertain material often leaves another obvious transition.
Begin at a loose edge. Lift the bead slowly and keep the tool close to the joint. A plastic removal tool may offer better control near finishes that scratch easily. If the material breaks, restart at the next raised section instead of digging into the wall or fixture.
After the main strip comes out, inspect both contact surfaces. Thin residue can remain even when the bead appears gone. Work along the joint until you can see the actual tub, tile, sink, countertop, or wall finish. Don’t widen the gap by cutting into grout or wall material.
Treat connected corners as part of the same inspection. A failed tub bead may continue behind the faucet end or around a return. Shower corners can look sound at eye level but separate closer to the pan. Sink rims often hide uneven residue along the back edge.
If you’d rather hand off the removal and replacement, professional caulking can help with difficult corners and stubborn residue. Fix Pro San Diego matches homeowners with licensed, independent local pros. The matched professional evaluates the joint and quotes the work.
Cleaning and drying the joint before resealing
A replacement bead starts with a bare, stable joint. Remove old caulk fragments, dust, and surface residue. Check both sides under direct light because translucent smears can be easy to miss.
Choose cleaning products that are compatible with the fixture and wall finish. Follow the product labels and the fixture maker’s care instructions. A cleaner suited to tile may not be intended for painted drywall, stone, acrylic, or metal trim.
Clear away the cleaning residue before applying caulk. A joint can look clean while still holding a thin film. That film may show up as streaks or slippery patches when viewed from an angle. Pay close attention to corners and textured tile.
The joint also needs time to dry. Wiping the surface isn’t the same as drying the gap. Moisture can remain behind a tub flange, under a sink rim, or inside a deep corner. Don’t reseal while drops or damp material remain visible.
For a tub, clean the horizontal ledge and the wall edge. Remove residue from plumbing trim only if that trim is part of the joint. For a shower, inspect vertical corners and the lower perimeter separately. For a sink, check the rim, backsplash seam, and any joint near a faucet base.
Masking tape can define the working area after cleaning. Keep each tape line straight and use a consistent distance from the joint. Remove any dust created while adjusting the tape.
Review the caulk maker’s instructions before opening the tube. Confirm the listed surface preparation, application conditions, and curing directions. Don’t expose the fresh bead to bathroom water until the stated cure process is complete. The bathroom caulking replacement guide covers the broader replacement decision.
What an even replacement bead looks like
An even bead has a consistent width and continuous contact. It bridges the joint without large bulges, thin skips, pinholes, or ragged edges. Its surface should look controlled from one end to the other.
Cut the applicator opening to match the joint rather than the old mess. An oversized opening releases more material than a narrow bathroom seam can accept. Hold the applicator at a steady angle and move along the joint without repeated stops.
Apply enough pressure to keep the line continuous. Changing hand pressure can create thick spots followed by narrow gaps. If the flow stops or the tip catches, pause and correct the problem. Don’t keep adding material across a section that already has too much.
Tool the bead according to the product instructions. The finished line should contact both surfaces and follow the joint. A light, consistent contour usually looks cleaner than a raised mound. Remove excess from the surrounding finish before it spreads into a wide film.
Tape, when used, should come away without pulling the entire bead out of position. Follow the caulk maker’s directions for tooling and tape removal. Afterward, inspect the line from several angles. Bathroom lighting can hide a skipped spot when you’re looking straight down.
Check the corners closely. A tub bead should meet adjoining joints without leaving an open endpoint. Shower seams should remain distinct instead of becoming a heavy mass where several lines meet. Around a sink, the bead should follow the rim without wandering onto the counter.
A clean appearance doesn’t promise that movement or hidden damage has been corrected. The replacement seals the prepared joint. It can’t stabilize loose tile, repair wall material, or correct a fixture that shifts.
Signs the joint needs tile or wall repair too
Caulk isn’t the whole repair when the surfaces around it have changed. Stop and inspect further if tile moves, grout breaks away, the gap keeps changing width, or the wall edge feels soft. Swollen trim, loose backing material, and staining beyond the bead also deserve attention.
Look behind the removed caulk before cleaning hides the clues. The joint should have two stable surfaces for the replacement material to meet. If an edge crumbles under light contact, adding caulk may only cover the visible symptom.
Tub and shower problems can appear differently. Around a tub, check the wall finish directly above the ledge and at both ends. In a shower, inspect lower corners, tile edges, and transitions around glass or metal trim. Near a sink, look below the rim and inside the cabinet if staining appears nearby.
Don’t use a wider caulk bead to conceal a damaged edge. That approach can blur the joint without correcting the surface. A local pro can determine whether the next step involves caulk removal, tile and grout repair, wall patching, or a separate plumbing evaluation.
For work you decide to hand off, you can verify a professional through the California Contractors State License Board license check. Ask the professional to describe what will be removed, what will be repaired, and which joints will be resealed. Keep those items clear in the written quote before work begins.
Ready for a quote
Hand the job to a pro when the old bead won’t release cleanly, the joint keeps opening, or nearby tile and wall material look damaged. Several tight corners that need a consistent finish are also a reason to match a pro. Call (858) 400-4611 and we’ll match you with a local pro who quotes the job before starting.
Would you rather hand this one to a pro than do it yourself? Call (858) 400-4611.
Request a quote