Removing shelves, televisions, and furniture can expose a wall with several unrelated holes. The clearest repair request groups that damage by room, size, texture, and paint boundary. Photos help a pro prepare questions, but they don’t establish the final repair scope.
Fix Pro San Diego connects homeowners with licensed, independent local pros. We don’t perform drywall work ourselves. A well-organized record helps the matched pro understand what needs an in-person look.
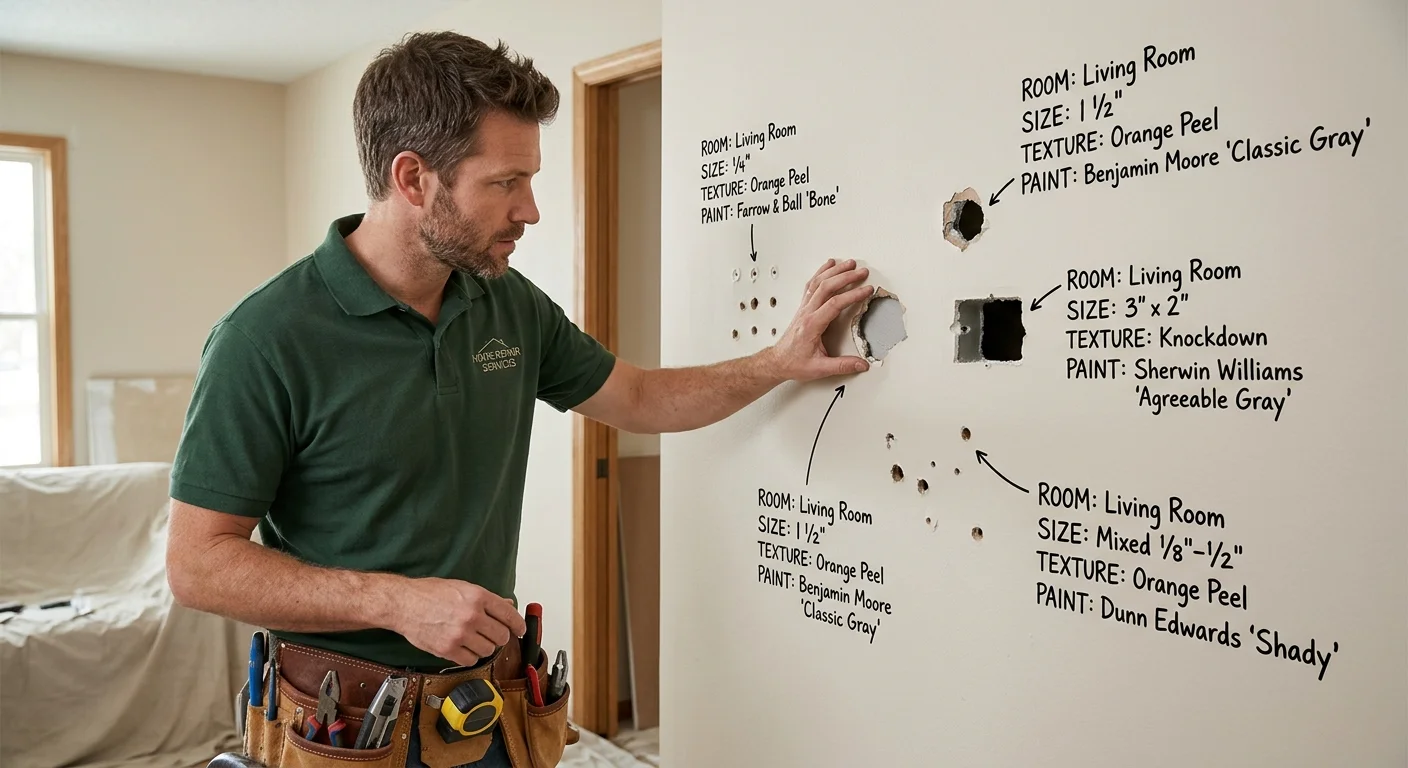
Group holes by room, size, and wall location
Start with a room-by-room list. “Several holes throughout the house” leaves too much unclear. A better entry reads, “living room, wall beside the patio door, four anchor holes.” Use the same format for every area.
Give each damaged area a short label. Examples include LR-1, BR-1, and Hall-1. Put that label in your notes and beside its photographs. If one wall has two separate clusters, label them separately.
Record the opening’s visible width and height. Place a tape measure beside it for the close photo. Don’t group every opening under the word “small.” A narrow fastener hole and an irregular opening from a removed bracket are different conditions to document.
Add the wall location. Note whether the damage sits near a corner, baseboard, door casing, ceiling, outlet, or mounted fixture. Photograph the surrounding area without making assumptions about what lies behind it. The drywall repair professional can evaluate that during the visit.
San Diego County requests also need a precise property location. “San Diego” could mean a home in Oceanside, Chula Vista, La Mesa, or City Heights. Include the city or community, property type, and the rooms involved.
Count visible areas only after assigning labels. That prevents one cluster from being counted in two photographs. It also keeps your request focused when comparing drywall patching services for several rooms.
Record anchors, torn paper, and damaged texture
Don’t describe every mark as a hole. Photograph and label what remains after each mounted item comes down. The visible condition may include an empty opening, an anchor still in place, raised material, torn face paper, or missing texture.
Leave uncertain items clearly marked in your notes. Write “anchor remains” when you can see one. Write “unknown hardware” when you can’t identify it. A photograph is more useful than guessing whether an object can be pulled, cut, or covered.
Use one straight-on close view for the opening. Add a side view when the wall surface appears raised or pushed inward. Keep the room label visible in both images. Natural room lighting is useful, but add a lamp from the side if the texture disappears in the first photo.
Record these visible details:
- Hardware or anchor still present
- Loose or torn surface paper
- Crushed or recessed edges
- Raised material around the opening
- Cracks extending beyond the fastener point
- Texture that’s missing, flattened, or damaged
- Visible staining or another condition needing separate review
Don’t diagnose the cause from a photograph. A crack near an old shelf bracket may deserve attention, but the image alone doesn’t establish why it formed. Note what you see and let the pro inspect it.
If you have only one straightforward opening, the drywall hole patching guide covers that narrower situation. This checklist is for several areas that need to stay distinct.
Separate wall repair from mounting requests
A move often creates two different job lists. One covers holes left by removed items. The other covers shelves, mirrors, televisions, art, or furniture that must be mounted elsewhere. Keep those requests separate even when you want one pro to review both.
Under “wall repair,” list only the visible drywall conditions. Include each room label, measurement, photograph, texture note, and paint boundary. Under “mounting,” identify the item and the intended wall. Include photographs of the item, its hardware, and the proposed location.
Don’t write “move shelf from bedroom to office” as the entire request. That sentence doesn’t show whether the old wall needs patching, whether hardware remains, or whether the new location is part of the same visit. Split it into two entries:
BR-2: holes and anchors where the shelf was removedOffice mount: shelf and hardware for the proposed new location
The separation also prevents repaired areas from disappearing inside a longer moving checklist. A pro reviewing drywall patching services can focus on the damaged walls. Any mounting request can receive its own questions and scope.
If you’re still deciding whether an opening is a patch or a broader wall repair, show the whole damaged area. The patch-or-panel comparison explains how to frame that conversation without deciding the answer from a phone photo.
Mention access issues as observations, not conclusions. Note furniture blocking the wall, items still mounted, or packed boxes near the work area. That tells the pro what they’ll encounter without promising that the space is ready.
Mark texture and paint boundaries around each area
A hole isn’t the only visible boundary. Your photo set should also show where the wall texture changes and where one paint area meets another. These details can extend beyond the opening itself.
Begin with a wide photo of the entire wall. Include nearby corners, trim, doors, or windows when possible. Those fixed features help identify the repair location later. Then take a medium view showing the damage and its surrounding finish.
For the close view, place the measurement beside the opening without covering torn paper or texture. Don’t crop so tightly that the finish becomes impossible to compare. Keep some undamaged wall visible around every side.
Look for visible texture differences. One wall may appear smooth while another has a repeating raised pattern. A repaired spot may already have a different finish from the surrounding wall. Describe only what you can see. If you don’t know the texture name, write “texture unknown” and include a side-lit photo.
Use the same approach for paint. Mark where the visible color or sheen changes. Show nearby trim, an accent wall edge, or an existing touch-up boundary when it falls close to the damage. Don’t promise that a saved paint can will match. Photograph its label and let the pro evaluate it.
San Diego County includes many separate cities and communities, but location alone doesn’t identify a wall finish. Photos from the actual room matter more than a broad neighborhood label. For help describing the surface, use this guide to drywall texture matching in San Diego.
Build one photo set for the repair request
Put every image into one ordered set before contacting a pro. Scattered text messages make it easy to separate a close-up from its room. A simple folder and filename system keeps the request readable.
For each damaged area, capture three views:
- A wide image showing the wall and room location
- A medium image showing the full damaged area
- A close image showing the opening and measurement
Name the files with the labels from your room list. LR-1-wide, LR-1-medium, and LR-1-close stay together when uploaded or sent. Repeat that pattern instead of relying on the phone’s image order.
Add one written line for each label. Include the room, wall location, visible size, remaining hardware, texture description, and paint boundary. Note whether the mounted item is already removed. If you want new mounting work, place that request in a separate section.
Review the set for missing context. A close photograph may show torn paper but hide the corner beside it. A wide photograph may show the wall while hiding the opening. Keep both instead of choosing one.
Don’t edit damage out of the frame or add digital marks over its edges. If you use arrows or circles, save the original image too. The original gives the pro an unobstructed view.
Treat the set as a starting point. Photographs can’t reveal every condition or settle the final scope. They can show whether your request involves one isolated drywall patch near you or several labeled areas across the property. The matched pro can then inspect the walls and quote the work before starting.
When to call us
Several rooms, mixed opening sizes, remaining anchors, or visible texture boundaries can make the work worth handing to a pro. Call us at (858) 400-4611 and we’ll match you with a local pro who quotes the job before starting.
Would you rather hand this one to a pro than do it yourself? Call (858) 400-4611.
Request a quote